I came across the following article on Apple Insider a few days ago and was initially enthused. I'd recently written a quick guide to a freeware tool for the Mac called Spaced and was hoping to find some more gems to get my menu bar under even more control. It turned out to be little more than an advertisement for Bartender, a paid app.
So, I've decided to write my own guide instead and this post has no paid anything. It's all freeware.
Using the basic menu bar
The macOS menu bar already has some in-built functionality for management of the icons added by the system, and many apps add icons to the menu bar upon installation. Let's run through the basics first, then we'll get into adding freeware to help you add some additional functions.
Moving icons
- CMD+CLICK on the icon you want to move. The icon will dim and stick to your mouse pointer.
- Drag the icon to the position you want it to stay. Like the Dock, the other icons will make room as you move the icon around, giving you space to drop it.
- Release the mouse button.
The vast majority of menu bar icons can be organized in this way, but some are reserved by the system. Those are Control Center, Siri, and Date & Time. Those three always remain all the way to the right end of the menu bar.
Removing icons
- CMD+CLICK on the icon you want to remove. The icon will dim and stick to your mouse pointer.
- Drag it away from the menu bar.
- When the "Ⓧ" appears next to the mouse pointer, release the mouse button. If the icon cannot be removed, you'll see "🚫" and it will jump back to where it was when you grabbed it when you release the mouse button.
While the menu bar does behave a bit like the Dock, it also does not. There's no Applications folder from which you can drag icons back to the menu bar. These functions are generally found in the options for various apps which offer menu bar icons or in the macOS Settings app for the various functions (i.e., wifi, Bluetooth, sound, etc.) Most of these, however, are handled by the Control Center which I cover in detail in the next section.
Editor's Note: It is both difficult to take screenshots of these actions and to find a "nope" symbol that is an emoji and isn't red or a very small wingding. Sorry if it looks weird!
Try to keep track of the apps that you remove menu bar icons for so you can turn them back on if you change your mind. You might also want to make sure that menu bar icon isn't actually helpful before you discard it. Optionally, you can remove it from the apps options panel so you've at least seen where the setting is should regret set in.
The Control Center
Apple knows that the menu bar can get crowded after a while, which I am sure is the reason they added the Control Center to macOS. On my desktop, it looks like this:
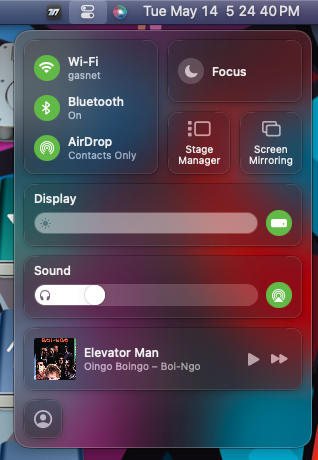
If you want to add a Control Center item to your menu bar, simply click and drag it over. You don't need to hold the CMD key. Adding a Control Center widget to the menu bar does not remove it from the Control Center, so if at some point you want to remove it from the menu bar, it will remain avaiable in the Control Center.
NOTE: You can also control the Control Center and where widgets appear in > System Settings... > Control Center. Options are Don't Show in Menu Bar, Show in Menu Bar, and for some, Show When Active. There are also additional modules you can add to either location, such as Fast User Switching or Accessibility Shortcuts.
Unless I've missed something, that's pretty much it. So, let's move on to the next level... enhancements.
Enhancing the basic menu bar
You can buy a few utilities to make your menu bar more functional, but I'm going to focus entirely on freeware solutions. The first utility is one I've already written about. You can find details about that utility in the following post:
In short, you combine the menu bar's in-built organization features with the clonable spacers of Spaced to effectively replicate Bartender's most visible feature.
Hiding menu bar items
Next we have Hidden Bar from Dwarves Foundation. Not only is it rated 4.5, #40 on the top 100 utilities list, and an Editor's Choice, it's entirely free. It's also simple to use, as illustrated in the image below.
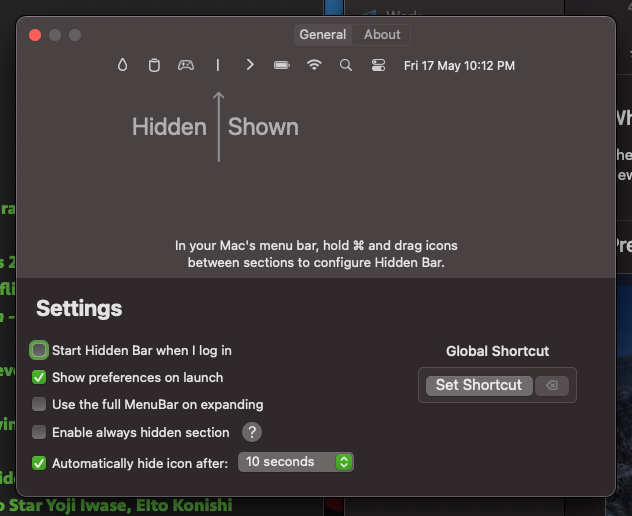
Using what you learned earlier about how to move icons around the menu bar, any icons you place to the left of the widget will be hidden away, either automatically after a set time or manually. The settings are as follows:
- Start Hidden Bar when I log in - The standard fare for utilities. This option launched the utility when you boot or reboot your machine so it's always running.
- Show preferences on launch - This is helpful while you're getting it set up. You can uncheck this when you're ready.
TIP: To access the Preferences when you've disabled this option, right click on the section bar "|" when Hidden Bar is expanded. You can also toggle the auto collapse feature and quit the app entirely from this menu.
- Use the full menu bar on expanding - I'd suggest you leave this off. When on, instead of expanding in the background and still showing the active app's menus, it switches to Hidden Bar's menu giving more room for more icons since Hidden Bar only has one menu. I presume this is helpful is you have a ludicrous number of icons on the menu bar, your apps have lots of menus, or you are using a MacBook Pro with a notch, none of which I have, so I can't say.
- Enable always hidden section - Unless you have icons you rarely need to access or see, you can leave this off. If you can, it's better to just turn off the menu bar option for these apps or utilities. When enabled, however, an additional section is added to the Hidden Bar area, as shown in the image below. Any icons moved to this section appear when you right-click the icon.
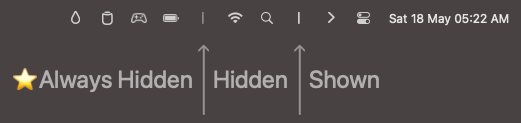
NOTE: Right clicking the Hidden Bar icon acts as a toggle between showing and hiding the Always Hidden section.
- Automatically hide icon after - You can choose from 5, 10, 15, and 30 seconds, and one minute. As it states on the tin, Hidden Bar collapses itself when you've left it alone for the selected period of time.
- Global Shortcut - If you'd like to have keyboard access to the icons you have in Hidden Bar, you can enter your own shortcut but clicking Set Shortcut and pressing a key combination, i.e., CTRL+OPT+CMD+H. This works like left-clicking the Hidden Bar icon, but does not have an option for showing Always Hidden icons. Do note, however, that clicking Set Shortcut gives no feedback until you press keys.
And that's pretty much that. With two free utilities and the in-built menu bar management tools of macOS, you've basically recreated the functionality of Bartender.
Changing the appearance of the menu bar
As you might have noticed in my screenshot in the Control Center section, my menu bar doesn't look like the standard menu bar that ships with macOS 14 "Sonoma", and for good reason; it's not. That's because I use Lickable Menu Bar, a freeware utility available on the App Store. It's a simple utility that doesn't even bother with a menu bar icon.
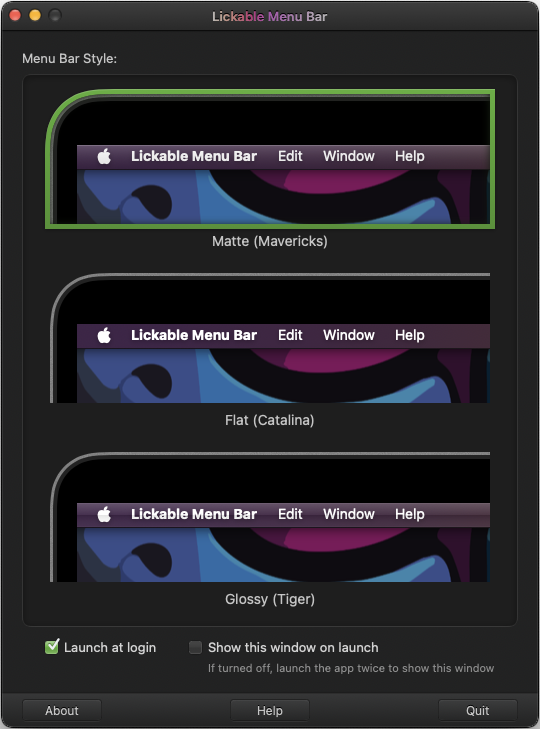
The only thing this utility does is allow you select one of three older versions of the menu bar's appearance, and in my case I have a preference for the menu bar of macOS Mavericks. It's also rather self-explanatory.
When you first run the app you'll see the settings dialog above. Simply click the theme you like, and the changes are made instantly. Make sure to check the Launch at Login option for it to start automatically and uncheck the Show this window at launch option when you're happy with your selection.
If you want to make a change after you've turned off the dialog, just launch the app again and the setting dialog will appear. If you want to stop using it, you can either uninstall it by dragging the app to the Trash or uncheck the Launch at Login option and quit the app using the app menu or the "Quit" button in the lower right corner of the dialog. Easy peasy.
Some honorable mentions...
While the following utilities don't modify or enhance the menu bar itself, they do add useful functions to the menu bar.
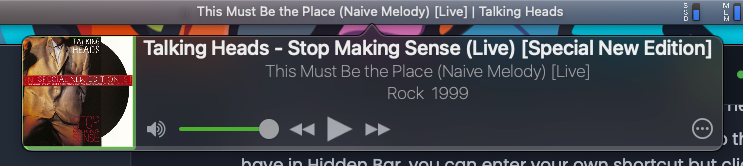
- WhatsOn - Now Playing [App Store link] - WhatsOn is a very simple menu bar utility that tells you what's playing in Apple Music. This is quite nice since the desktop notification doesn't last that long and Music may be minimized to the Dock or hiding behind another window. Clicking on it gives you access to controls and album art and details.
- ClipTools [Website link] - This free utility from MacMost.com makes your Mac's clipboard into a powerhouse and, unlike the other apps in this post, this one is not available in the App Store. It remembers everything you've copied, allows you to save specific clips for quick pasting, and lots of other functions. The only downside to the utility is that it does not store copied images. So, if you copy an image and then copy some text, you will not find that previously copied image in the list of clips. If, however, you use your clipboard a lot, this is a must have.

The takeaway
The menu bar appears to be a very simple tool in a rich and capable operating system, but it can be much more than that. It's nice to know that there are plenty of freeware apps and utilities which can quickly enhance how the menu bar works.
And speaking of Freeware, I'll be adding more apps to my macOS Freeware series soon, and the next one will likely be one of my latest obsessions and the tool I am currently using the write my blog posts; Appflowy.
If you have any suggestions for additions to this article or other freeware for macOS please comment below. I read all comments. I don't get many, so it's not hard 🤣
Thanks for reading!